
Inbound Lead Forms: Setup & Embed Guide (merged draft)
What are inbound lead forms?
Most forms send leads into an inbox, and by the time you follow up, they've moved on. With Project Blue inbound lead forms, the lead starts the conversation instead: they opt in, their messaging app opens with a prefilled message, and they send it straight to your Project Blue line. Because the lead texts first, they see the blue bubble chat right away, which often leads to much higher response rates.
Availability: not available on trial accounts. Works with accounts connected to HighLevel, HubSpot, Close, API or External CRM sources. The two step form requires a HighLevel sub-account (its calendar is loaded from HighLevel). The Text us button works with any CRM. [TO CONFIRM with product]
Use cases
Lead magnets: a prefilled message like "FITNESS10" or "FREE5" that you can act on in your CRM or automations.
Free consultations or strategy offers: the lead taps once and starts a conversation with you.
Support or contact pages: route messages to a specific line, such as a support line.
Which form type should I pick?
Go to Inbound Lead Form in the web app and click New lead form. You can choose from three types:
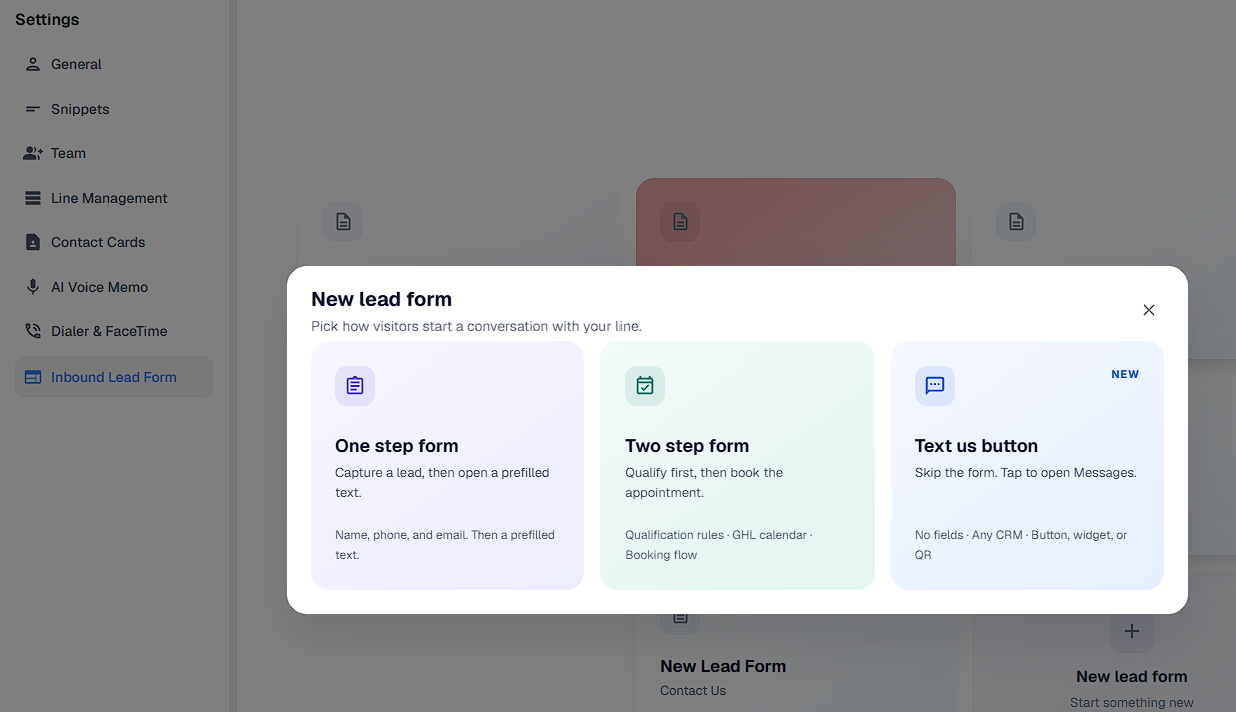
One step form: captures name, phone and email, then opens a prefilled text.
Two step form: qualify the lead first, then book the appointment. Includes disqualification rules and a HighLevel calendar booking step.
Text us button (new): skips the form. The visitor taps a button and Messages opens with a prefilled text. No fields, works with any CRM, and can be shared as a hosted link, button, floating widget or QR code.
Setting up a one step form
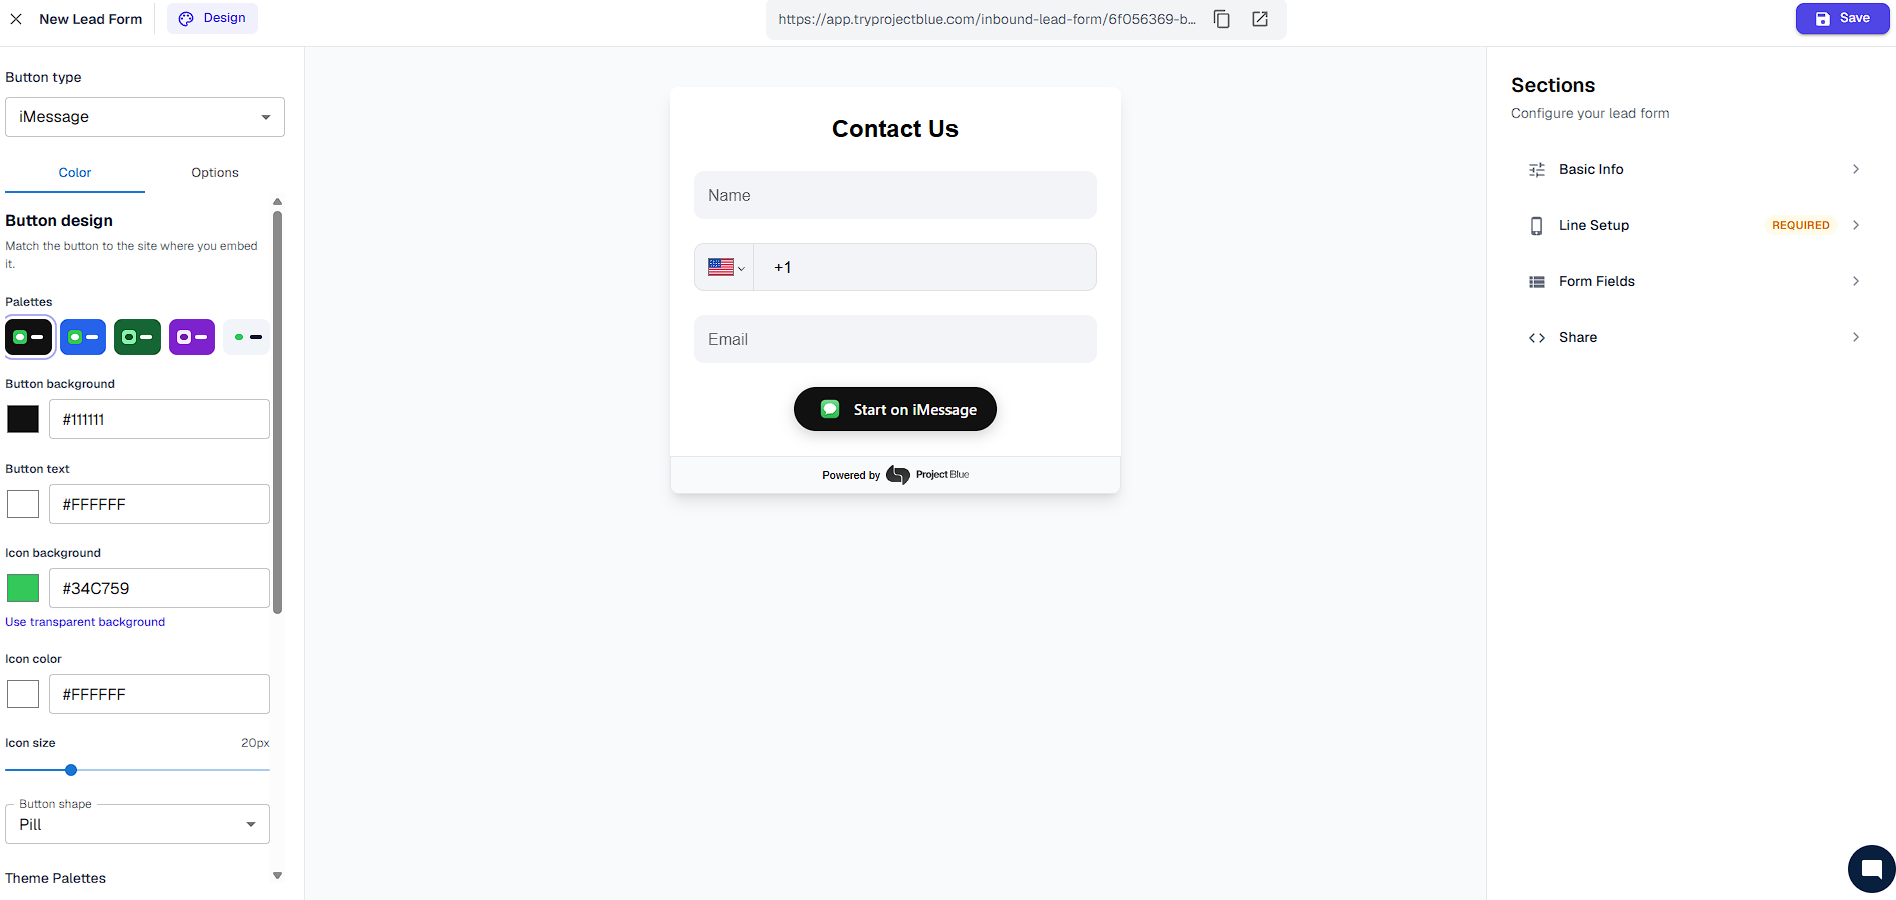
The builder is organized into sections on the right: Basic Info, Line Setup (required), Form Fields and Share, plus a Design view at the top.
1. Basic Info
Name your form (an internal name, such as "Support form") and set the heading visitors will see, such as "Contact Us". Contacts created from the form are tagged with the form name.
2. Line Setup (required)
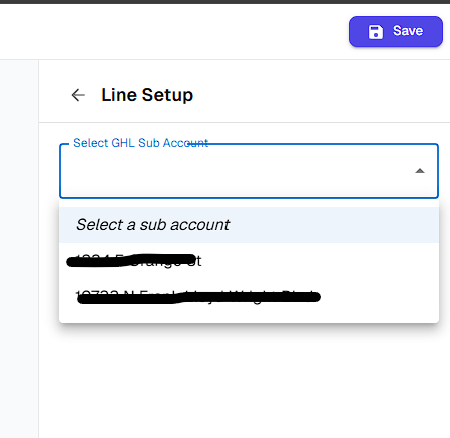
Choose which Project Blue line receives the lead's message. You can select more than one line.
Also set the prefilled message the lead's messaging app will show. It can be a phrase, a sentence or a code you can act on in your CRM or automations.
3. Form Fields
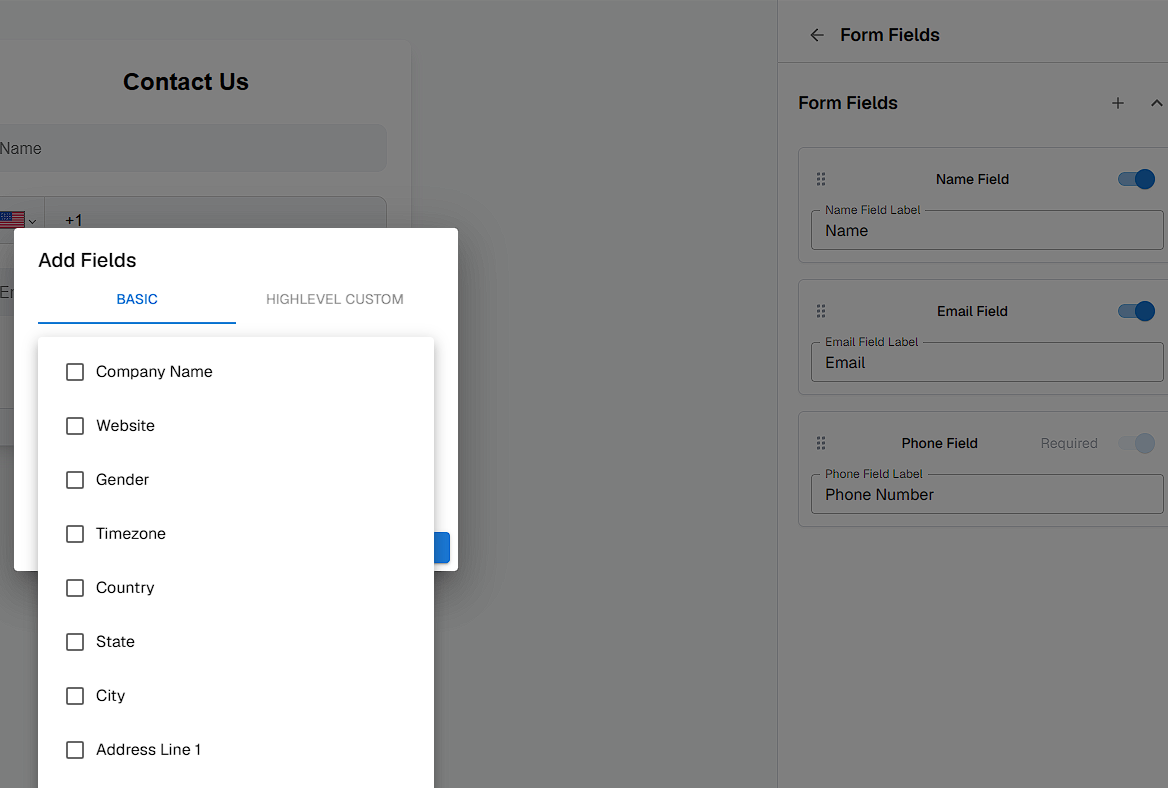
Name and email can be turned on or off, and you can edit each label. Phone number is required. Use the + button to add more fields. If your GoHighLevel account is connected, your GoHighLevel custom fields can also be added.
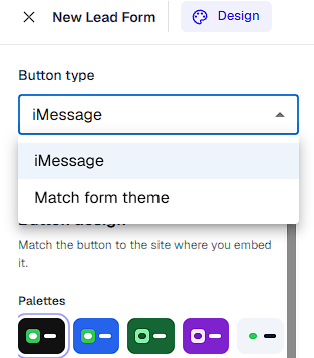
4. Design
Match the button to the site where you embed it. You can change:
Button type (for example, iMessage)
Palette, button background, button text, icon background, icon color and icon size
Button shape (for example, Pill)
5. Share
Preview the form to test it, then click Save. Choose how to put it on your site:
Inline: the form sits directly on the page. Set a width (for example 100%, 960px or 800px); the height adjusts automatically to fit the content.
Popup: a floating button opens the form in a modal overlay. Set the button text and color.
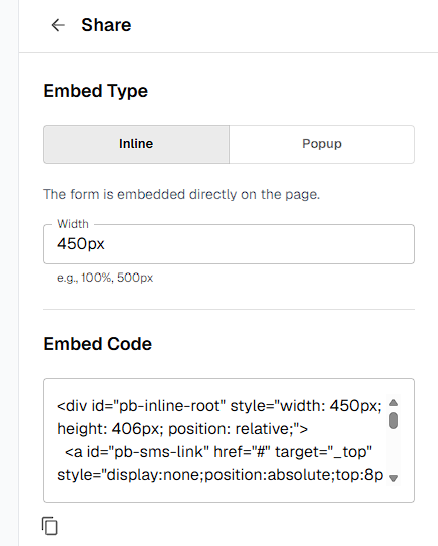
Copy the embed code and paste it into a code embed block on your site (Webflow, for example).
What the lead experiences
The lead fills out the form (name, phone, email).
They tap the button (for example, "Start on iMessage").
Their messaging app opens with the prefilled message ready to send. On iPhone and Mac this opens iMessage, on Android it opens the Messages app, and on the web it uses the SMS link scheme on compatible devices.
They tap send, and the message arrives on your selected Project Blue line, along with their contact card.
[SCREENSHOT 5: phone screenshot of Messages opened with the prefilled text (needs a new capture). Alt text: Prefilled message in the lead's messaging app]
Two step form: what's different
Use this when you want to qualify leads before they book an appointment. It requires a HighLevel sub-account. The sections are Basic Info (required), Select Calendar (required), Form Fields, Disqualification Rules and Share.
This video covers both the two step form and the Text us button:
Basic Info
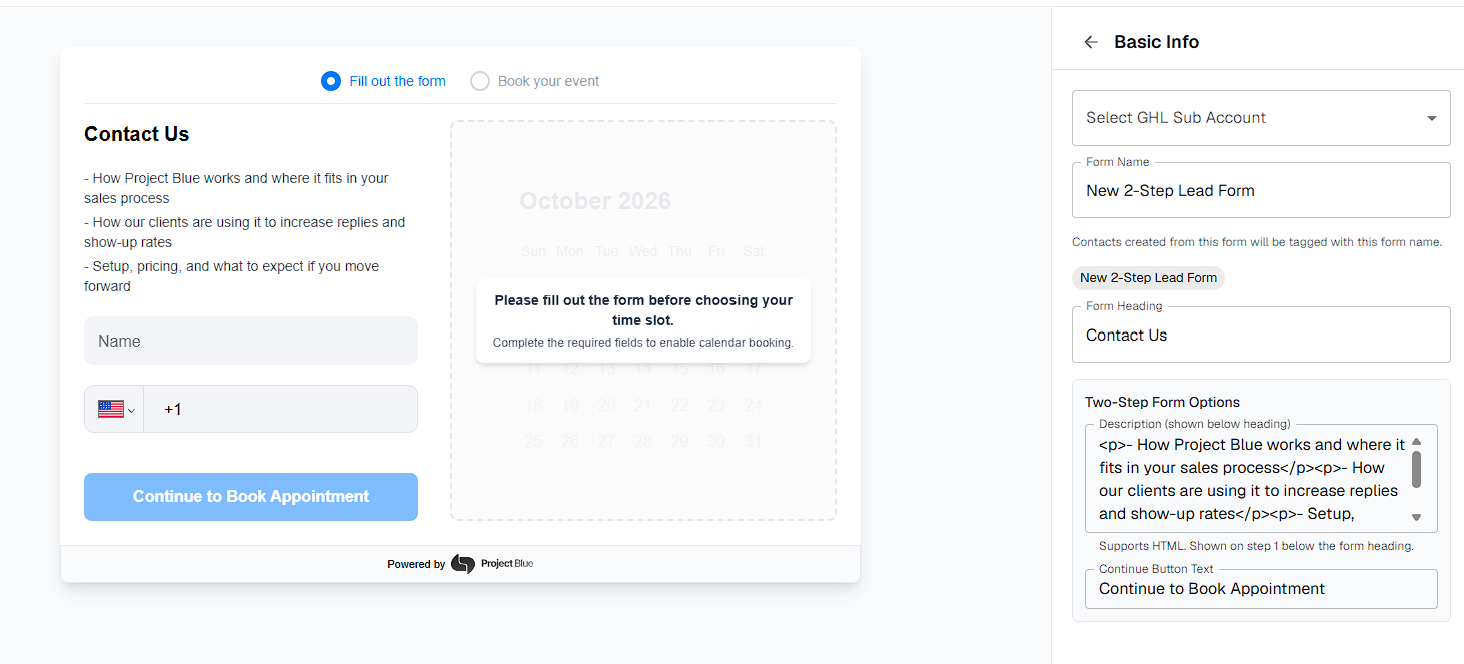
Select GHL Sub Account: choose the HighLevel sub-account to connect. Do this first, because calendars load from this account.
Form Name and Form Heading: contacts created from the form are tagged with the form name.
Description: optional text shown under the heading on step 1. It supports HTML.
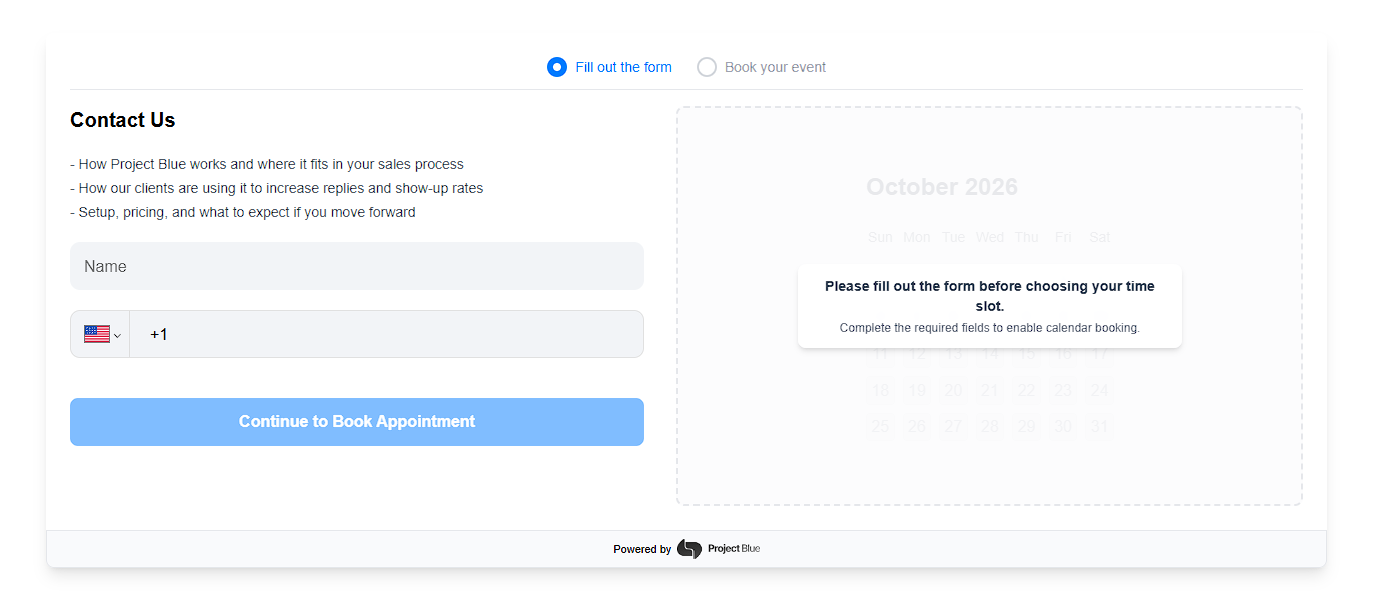
Continue Button Text: the label on the button that moves the visitor to booking, for example "Continue to Book Appointment".
Select Calendar (required)
Pick the HighLevel calendar visitors will book on. If no calendars appear, make sure you selected a sub-account in Basic Info first.
Form Fields
Same as the one step form: name and email are optional, phone is required, and you can add more fields.
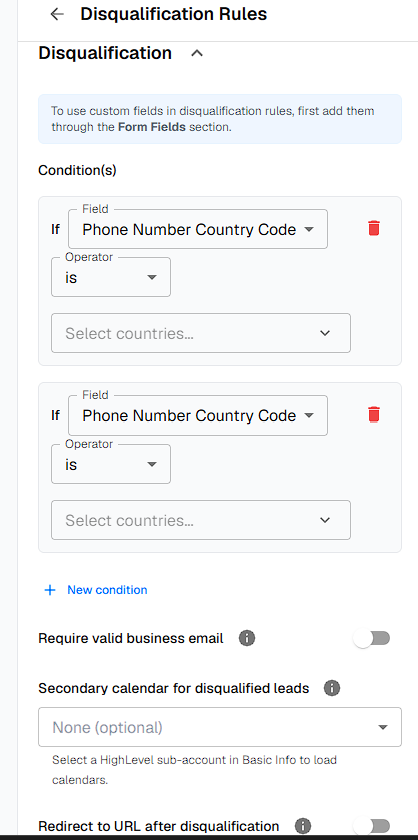
Disqualification Rules
Decide which leads shouldn't book the main calendar. Available options:
Conditions: add a rule with + New condition to disqualify leads based on their answers. To use a custom field in a rule, add it in Form Fields first.
Require valid business email (on/off)
Secondary calendar for disqualified leads (optional)
Redirect to URL after disqualification (on/off)
What the visitor sees
The form has two tabs: Fill out the form and Book your event. The calendar is shown beside the form but locked until the visitor completes the required fields. They then continue to pick a time slot.
Design and Share
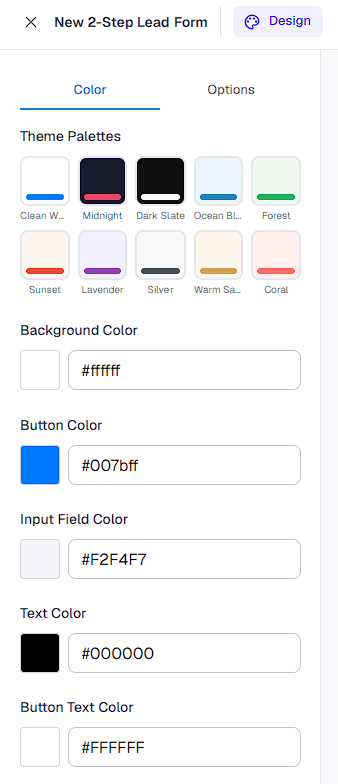
Design has a Color tab with theme palettes and custom background, button, input field, text and button text colors, and an Options tab. Share works like the one step form: Inline or Popup, then copy the embed code.
Text us button: what's different
There is no form to fill out. The visitor taps a button, Messages opens with a prefilled text, and the conversation starts on your Project Blue line. The lead is created by the inbound text, so it works with every CRM and for API users with no CRM. The sections are Button & Message, Line Setup (required) and Share.
Button & Message
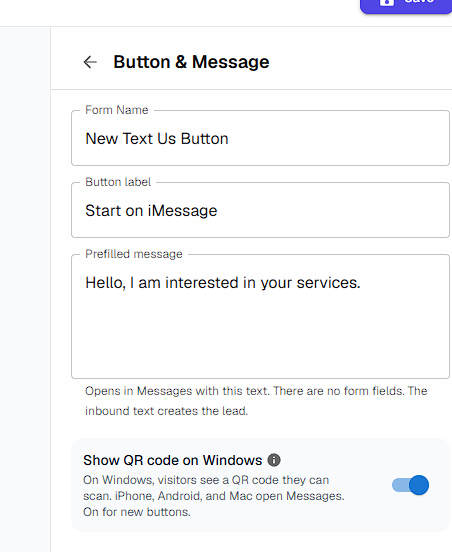
Form Name: an internal name for the button.
Button label: the text on the button, for example "Start on iMessage".
Prefilled message: the text that opens in Messages, for example "Hello, I am interested in your services." There are no form fields; the inbound text creates the lead.
Show QR code on Windows: on by default for new buttons. Visitors on Windows see a QR code they can scan with their phone, while iPhone, Android and Mac open Messages directly.
Line Setup (required)
Choose one or more Project Blue lines. Inbound-only lines are allowed. The lead is created when the visitor texts in.
Share
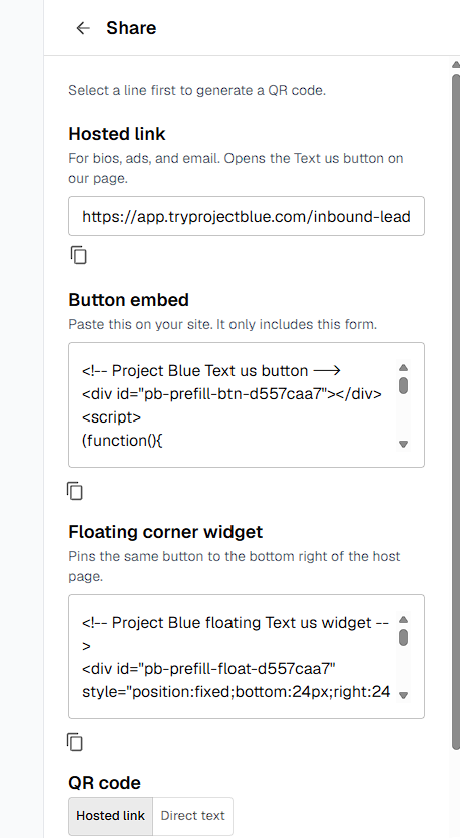
Select a line first. Then choose how to share:
Hosted link: for bios, ads and email. Opens the Text us button on a Project Blue page.
Button embed: paste the code on your site. It only includes this button.
Floating corner widget: pins the same button to the bottom right of the page it's embedded on.
QR code: available for the hosted link or for a direct text.
Design
Choose a palette, then adjust button background, button text, icon background, icon color, icon size and button shape (for example, Pill).
Testing before you go live
Use the preview link to open your form or button in a new tab and test it on your own phone before adding it to your site.