
How to Schedule a Message
You can schedule a message to send later, and set the hours and time zone your account or each line sends in.
Schedule a message to send later
In the Project Blue web app and Chrome extension:
Write your message as usual.
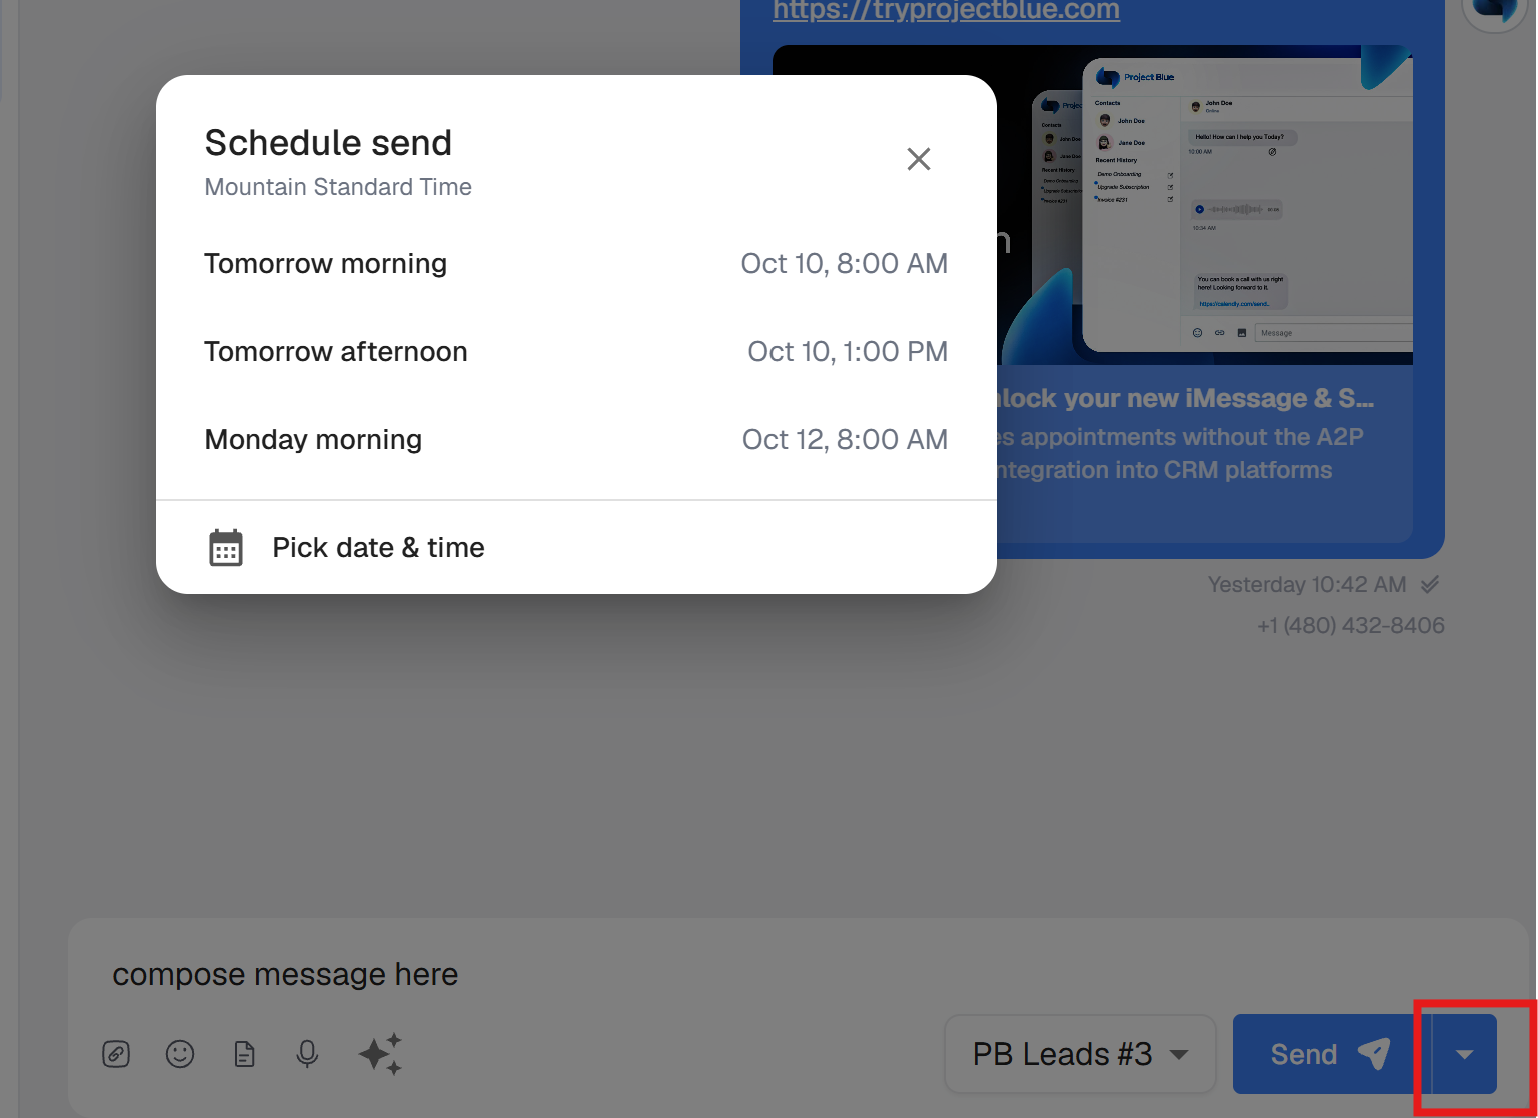
Click the small arrow on the right side of the Send button. Pick Tomorrow morning (8 AM), Tomorrow afternoon (1 PM) or Monday morning (8 AM), or choose Pick date & time. The menu shows the time zone you're scheduling in. This is your browser's time zone, not the time zone in your Settings, and nothing is converted: the message goes out at the time shown in the menu.
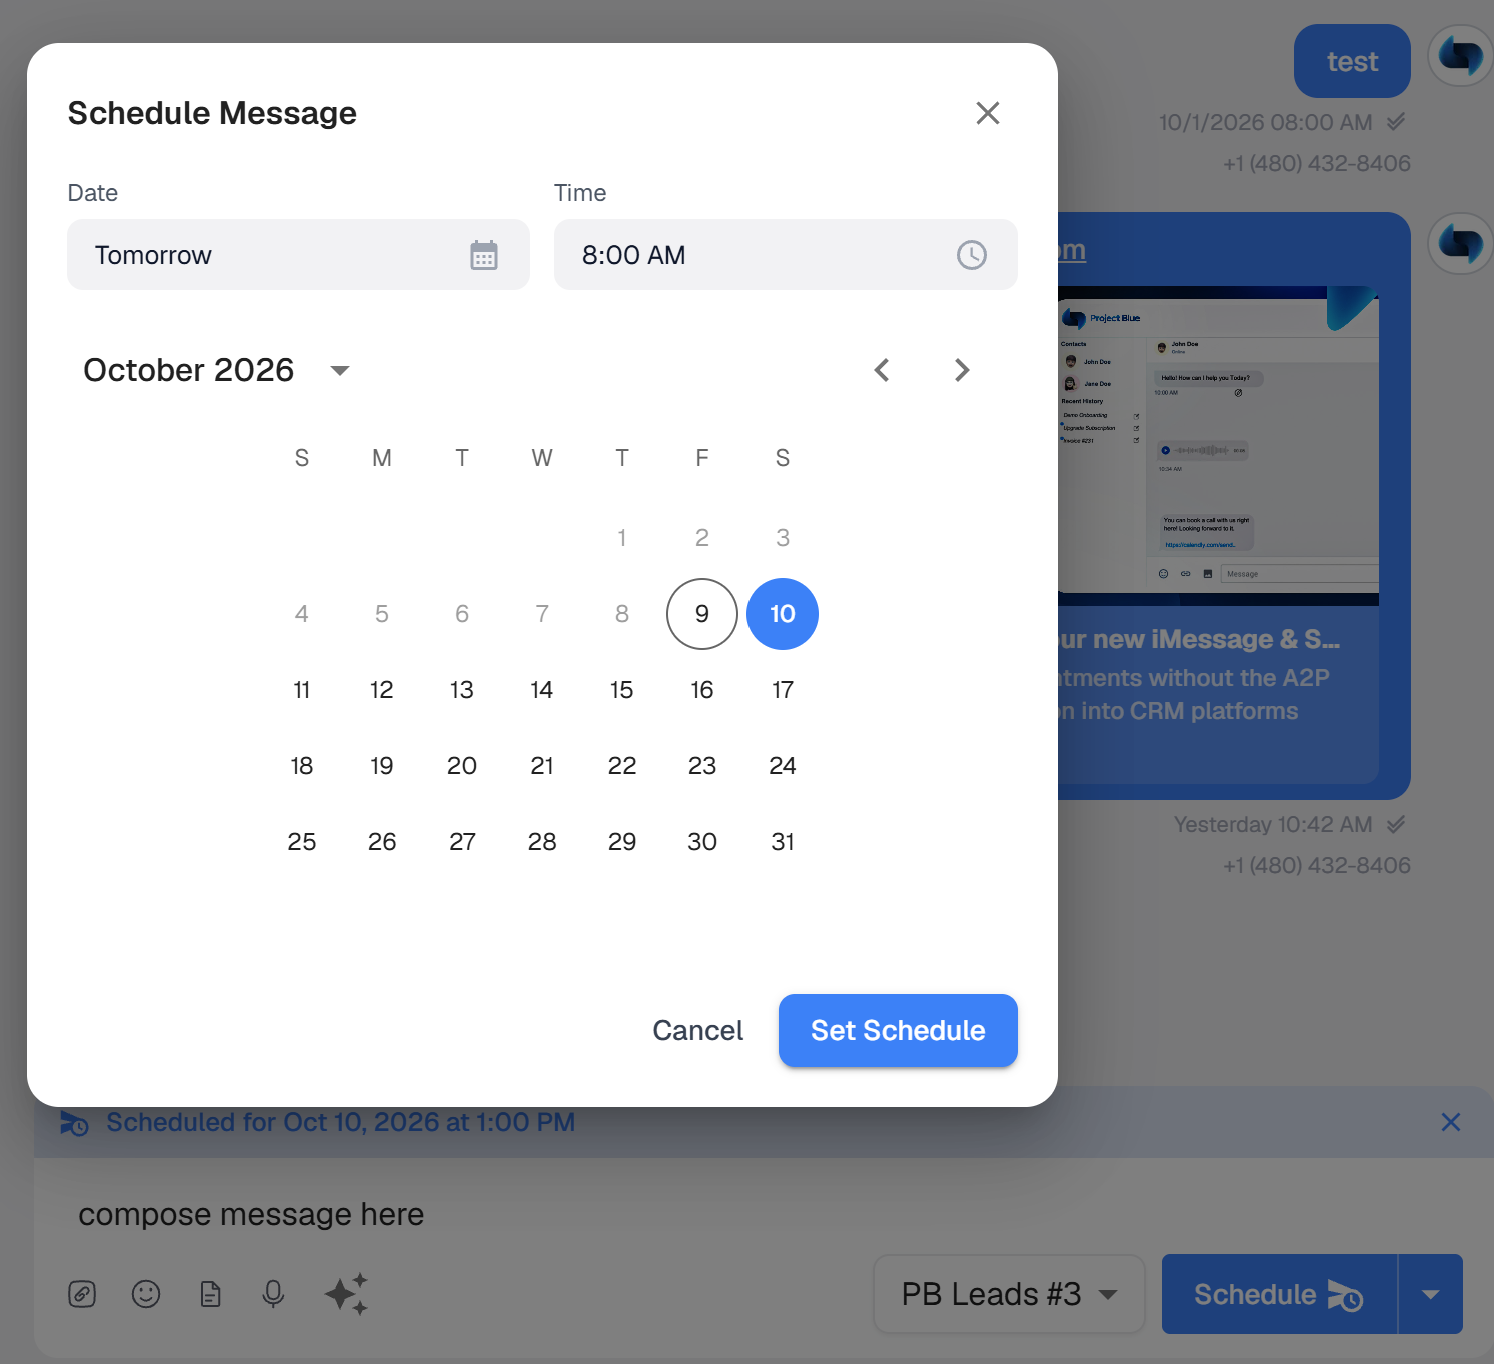
If you chose Pick date & time, set the date and time in the Schedule Message window, then click Set Schedule. You can't pick a time in the past.
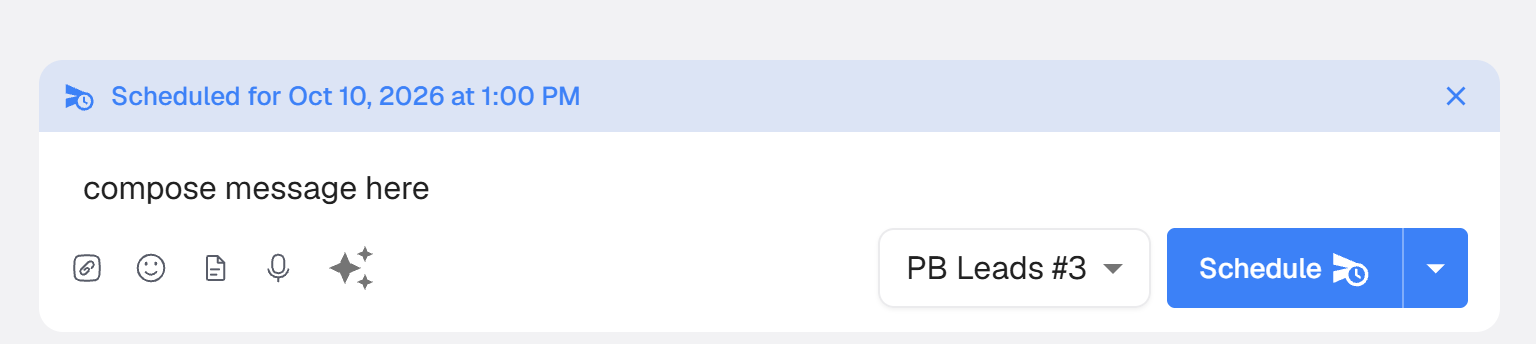
A banner above the message box shows “Scheduled for…” and the Send button changes to Schedule. Click Schedule to schedule the message. To remove the schedule before you do, click the X on the banner.
Check the time before you click Schedule. Once a message is scheduled, you can't cancel, edit or reschedule it yourself. If a scheduled message needs to be stopped, contact Project Blue support.
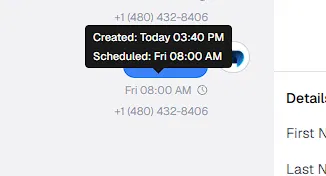
A scheduled message shows in the conversation as a normal outgoing message with a small clock icon and the scheduled time. Hover over it to see when it was created, scheduled and sent.
You can't schedule the first message in a brand-new group chat. It sends right away.
Scheduling settings: time zone and hours
Scheduling settings control your time zone and the hours messages are allowed to go out. You can set them for the whole account, and separately for each line. Per-line settings are useful when each line serves customers in a different time zone, so you don't need a separate account for every line.
Find them in Settings > General > Scheduling. Scheduling settings aren't available on trial accounts.
Global (account level): on the Global tab, set the Global Time Zone, Global Start Time and Global End Time, then click Save. These apply to every line unless a line has its own schedule.
Line level: on the Line tab, the Line-Specific Override table lists each line with its time zone, start time and end time, filled in with your global values. To give a line its own schedule, change the time zone, start time or end time and click Save. The line is then marked Override. To go back to the global schedule, click Clear, and the line is marked Global again.
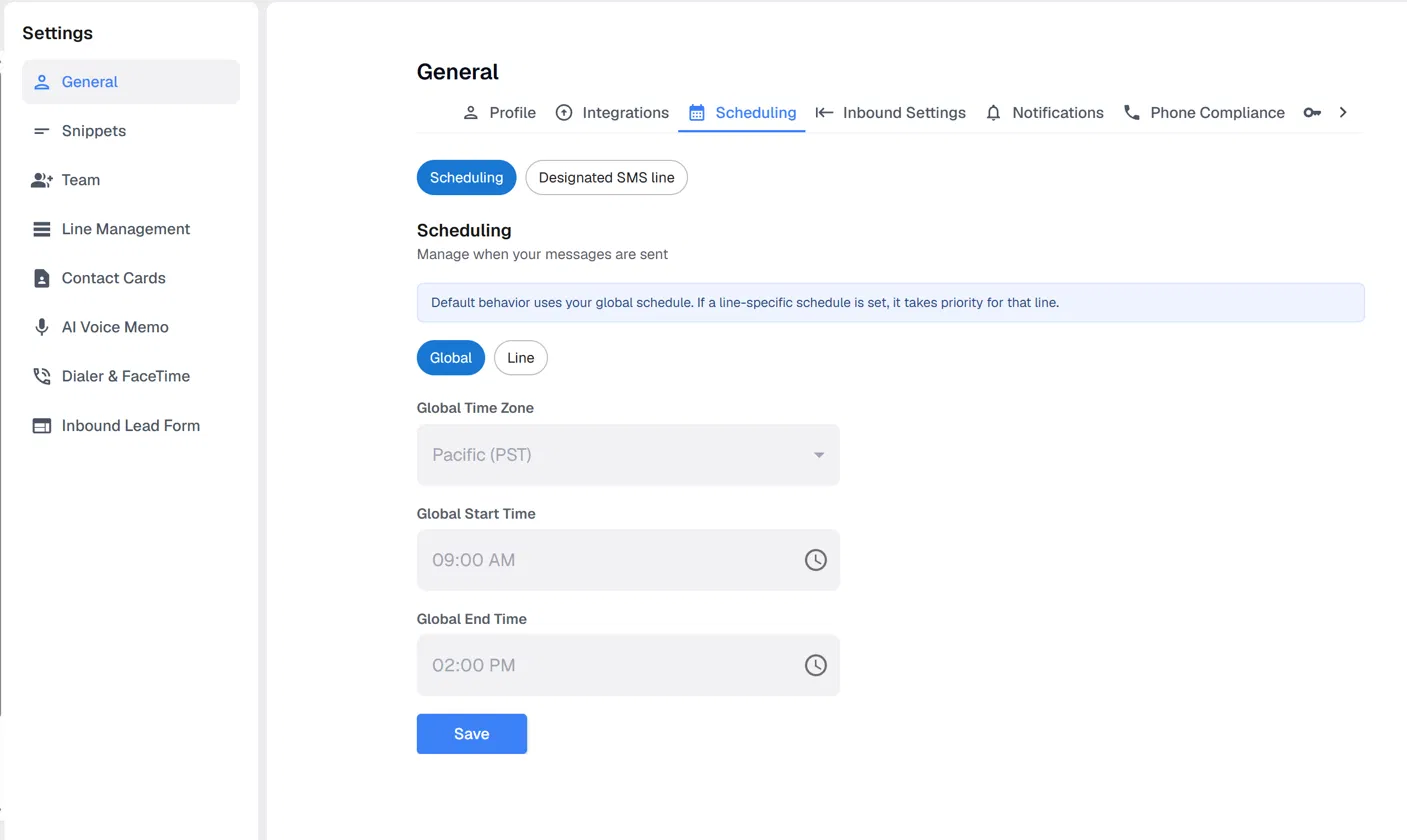
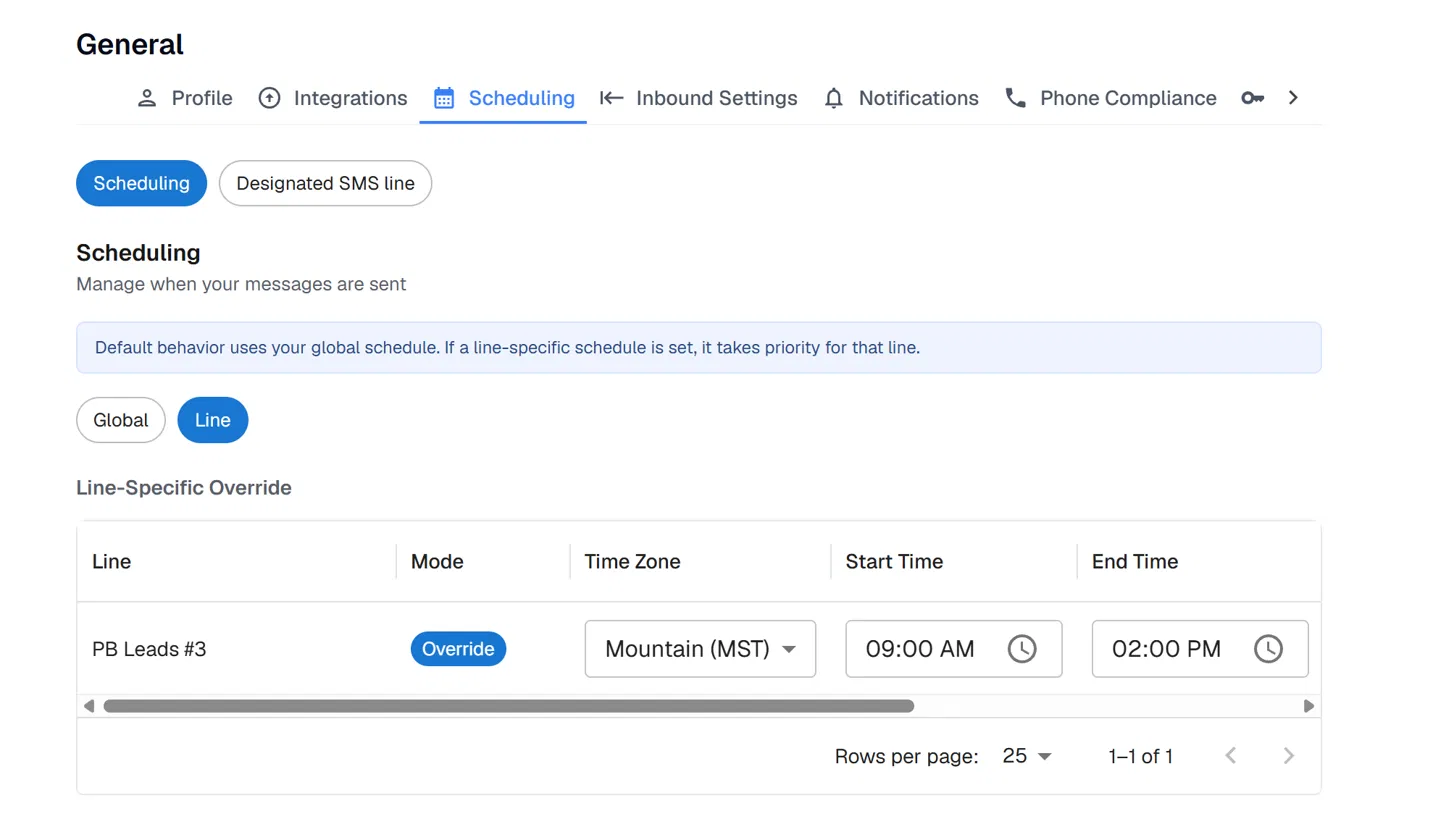
Things to know about these settings:
You can choose Hawaii, Alaska, Pacific, Mountain, Central or Eastern time.
Start and end times move in 15-minute steps, and the sending window can't run past midnight.
The same hours apply every day of the week.
There are no default hours. Until you save a schedule, no sending window is set.
What the sending hours do
A message you schedule yourself goes out at the exact time you pick, even if that's outside your sending hours.
Messages you send right away, and messages sent by workflows or the API, wait for your next sending window if they're sent outside your sending hours.
Workflows and the API can't schedule a message for a specific time, so for them the sending hours are the only timing control.
Good to know
Messages can send up to a minute after you hit send, because they go through a send queue. A scheduled message goes out at your chosen time, also through that queue.
Scheduling works in the web app and Chrome extension.
A message can also wait because of daily sending limits. This is separate from scheduling, so a waiting message isn't necessarily a scheduled one.