
How to Share One Line With Multiple Users (Line Groups)
This guide shows you how to let several people on your team work from the same Project Blue line. For example, a team of closers can share one notification line while each keeps their own personal line.
Not the same as group chats. Line groups control who can work a line. Group chats are iMessage threads with multiple participants (see How to Start a Group Chat). This article covers line groups only.
What group members get
Shared access: Every member sees the group's lines and all of their conversations in chat and the Chrome extension, unless Only own conversations is turned on for them. See Conversation Owners.
Calls: Who rings on inbound calls is one account-wide setting in Settings → Dialer & FaceTime (with Inbound calls turned on), and you pick one rule for the whole account, not a mix. With Person assigned to the line, an inbound call on a group line rings every member at the same time for 30 seconds, and the first person to answer takes the call. You assign the group itself to the line, not one person from it. With Specific people, only the individual people you tick ring. That list shows the account owner and team members who have accepted their invite, but it has no option to pick a group, so a group's members don't ring unless you tick them yourself. A group with no members rings nobody. The line needs a Dialer subscription. See How to Set Up Inbound Dialing (Dialer & FaceTime).
Alerts: Every member who has accepted their invite, uses the mobile app and has inbound alerts turned on gets a push notification for every inbound text on a group line. Once a conversation has an owner, members with the User role only get a push for the conversations they own. See Conversation Owners.
CRM sends: A new conversation started from a member's CRM can start on any line they can reach: their own assigned lines plus every line in their groups. Existing conversations stay on their line.
Workspaces that don't use groups see no change.
Who needs a group? Team members with the User role only see conversations on lines assigned to them, including lines assigned through a group, so groups are how you share a line with them. Members with User, all lines see every line but have the same limited menus as User. Admins have full access, and the account owner sees everything. You can change someone's role in Settings → Team → Users.
Who can manage groups: the account owner, a team Admin or an agency admin. Members with the User or User, all lines role can't create, edit or delete groups.
Steps
1. Create a group
Go to Settings → Team and open the Groups tab.
Click + New group.
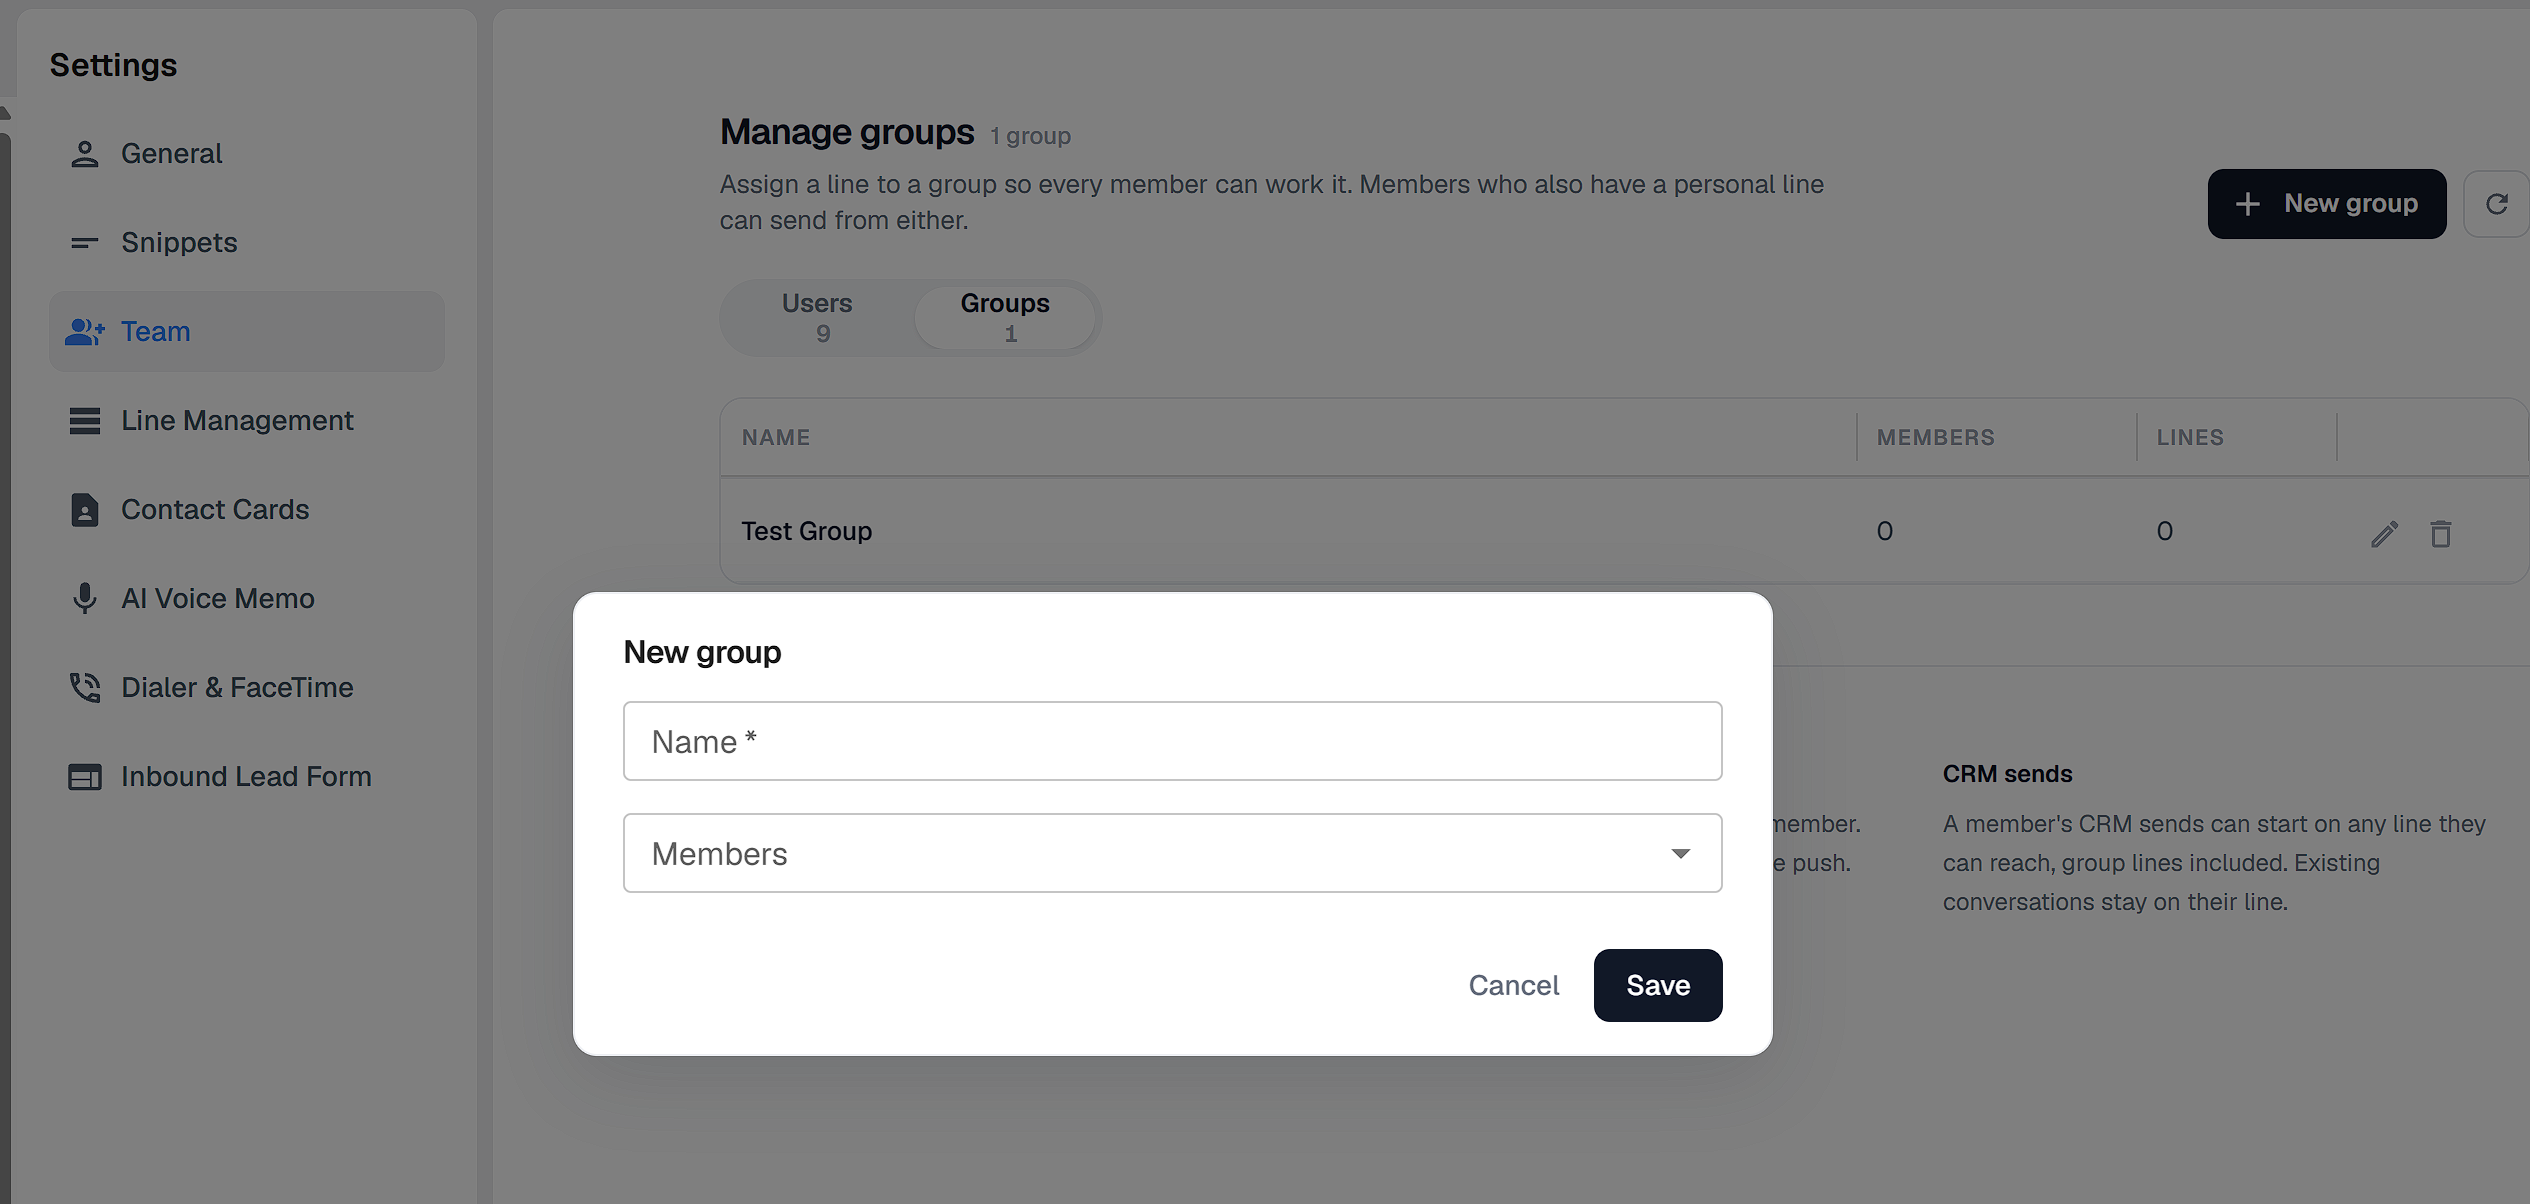
Enter a Name (for example, "Closers"). Names can be up to 60 characters and must be unique on your account.
Use Members to add the team members who should share the line. You can also leave this empty and add people later. A person can belong to more than one group.
Click Save.
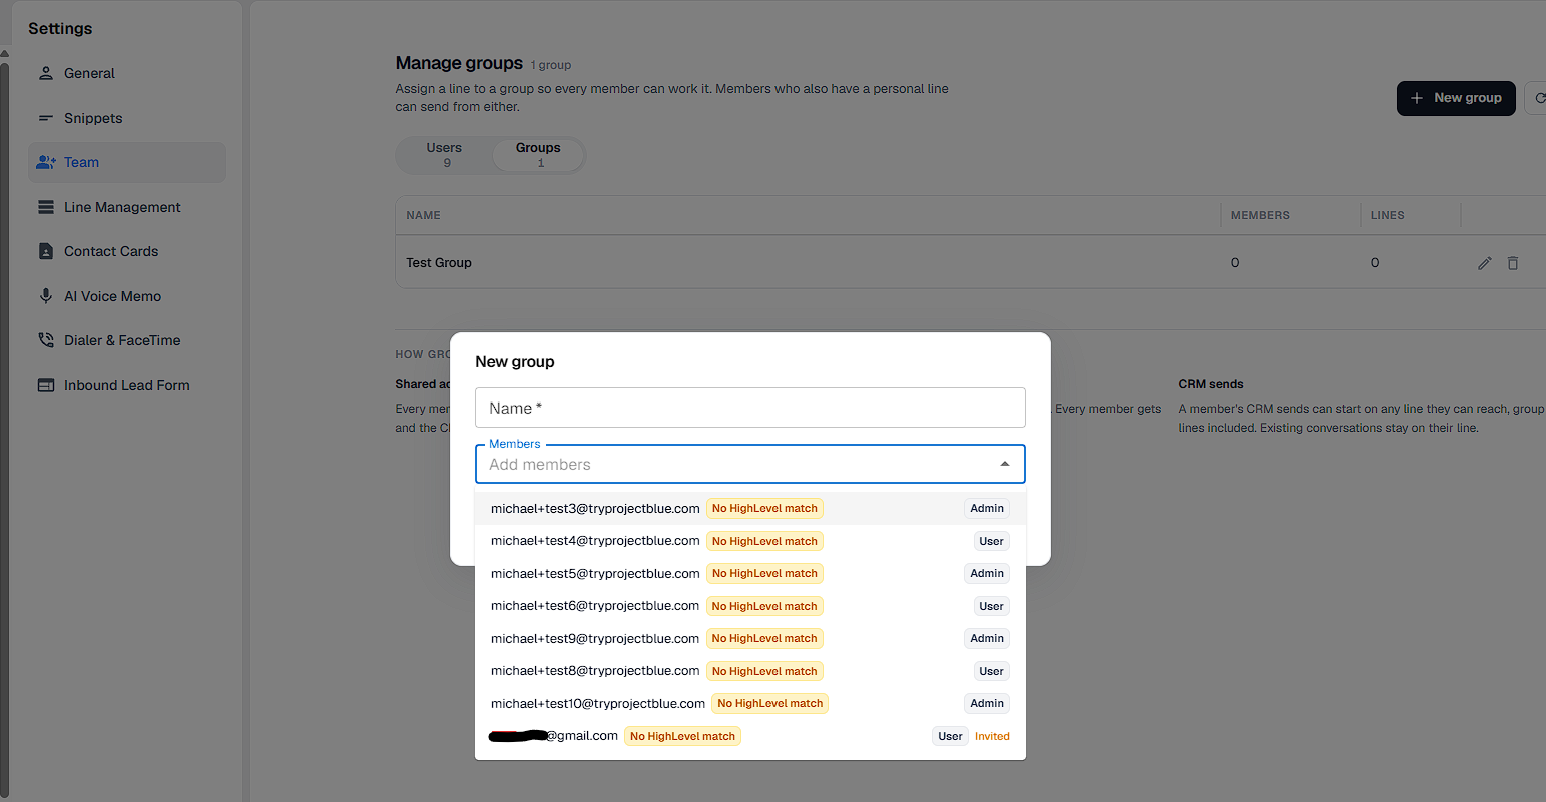
In the member list, each person shows their role (Admin or User). Anyone who hasn't accepted their invite yet shows an Invited tag, and anyone whose email doesn't match a user in your CRM shows a No HighLevel match tag. You can still add them as members. Group members are matched to your CRM users by email, so for group sends from your CRM to work, the CRM user's email has to match the team member's invite email. Aliases like name+tag@ count as the same email.
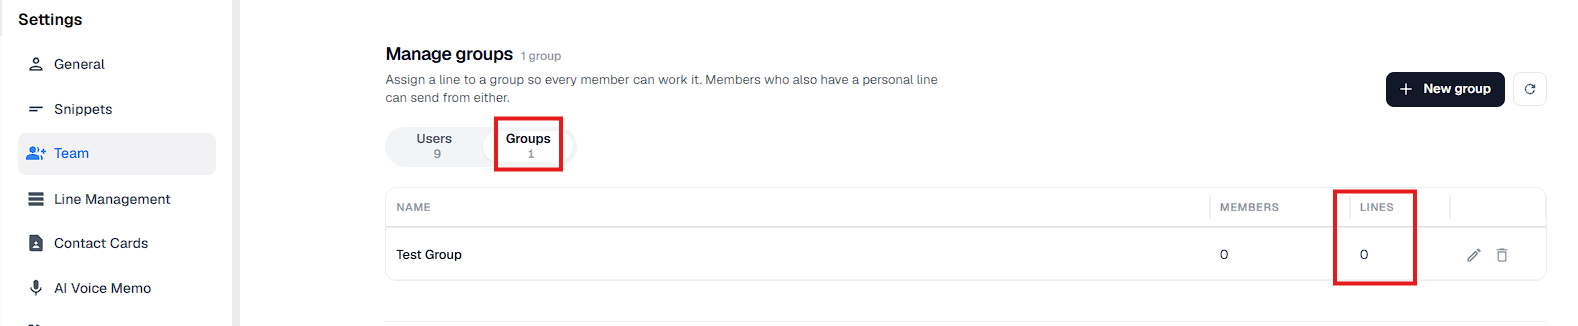
The Groups tab lists each group with its number of members and lines. To rename a group or add and remove members, click the pencil icon to open Edit group. To delete a group, click the trash icon. You can't delete a group that still has lines. Unassign the group from its lines first.
2. Assign the line to the group
Go to Settings → Line Management.
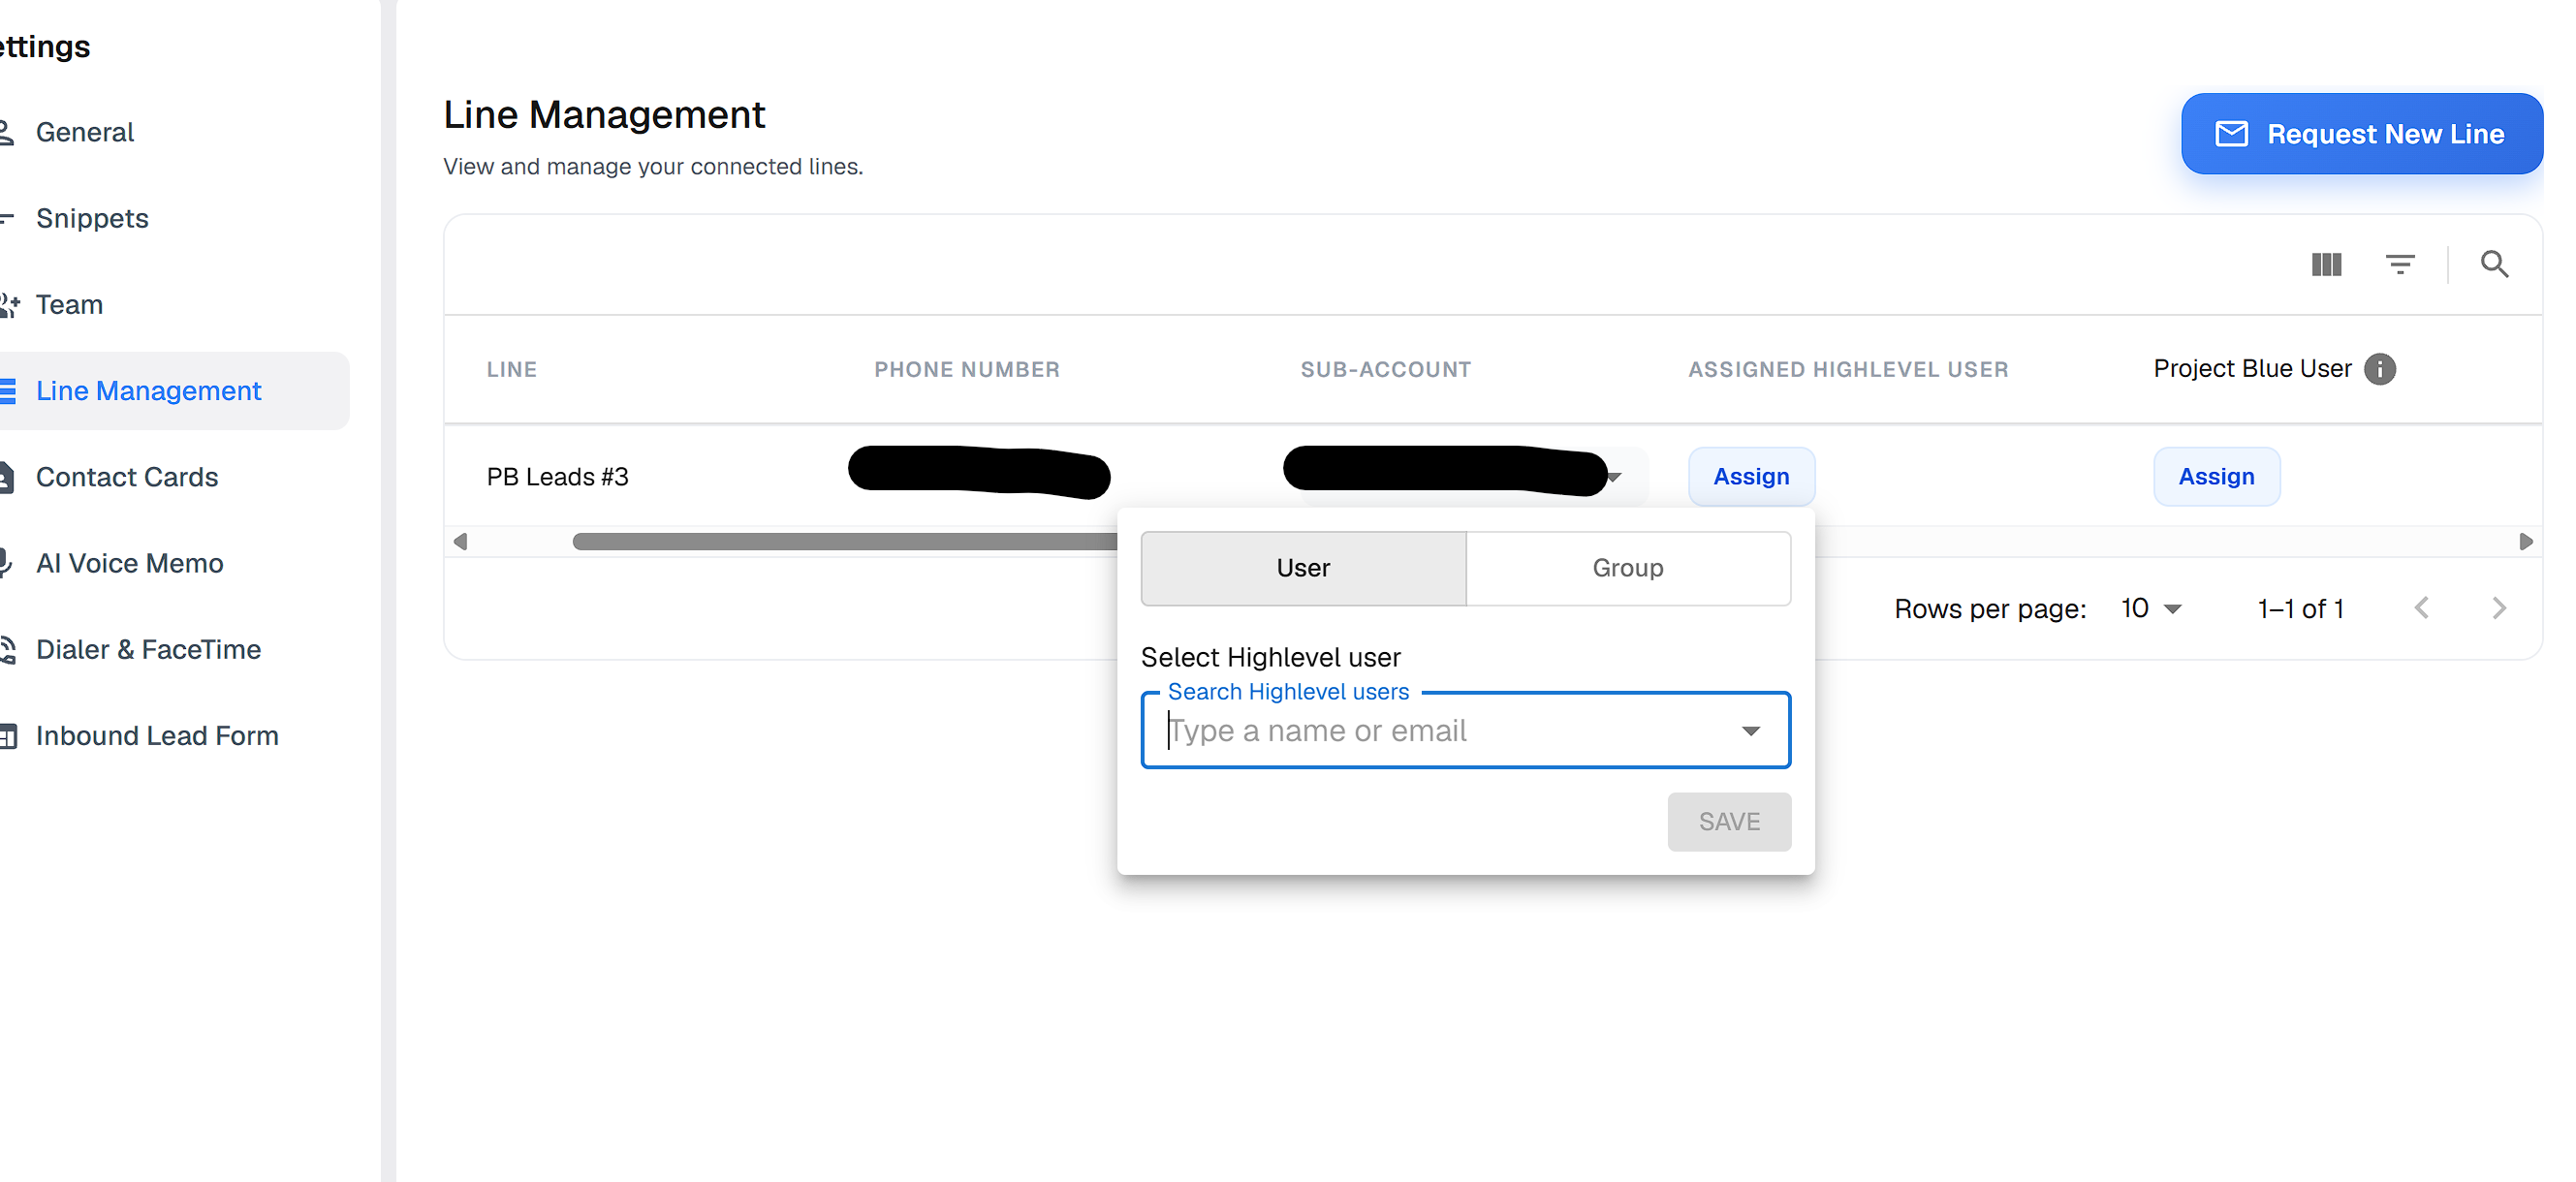
Find the line you want to share. In the assigned CRM user column (for example, Assigned Highlevel User, Assigned HubSpot User or Assigned Close User), click Assign. Accounts without a CRM see a single Assigned column.
At the top of the popup, switch from User to Group. The switch only appears once your account has at least one group.
Under Select group, search for and choose your group.
Check the line. The CRM column shows the group name with a people icon (hover to see the members' emails), and the Project Blue User column shows the member count, for example "4 members." Both columns fill in from this one assignment, so you don't need to assign it twice. The count includes people who haven't accepted their invite yet.
A line can be in only one group, and it can't be in a group and assigned to one person at the same time. Assigning a group clears the person, and assigning a person clears the group.
3. Repeat for each line
Do this for every line you want the group to share.
Verify it worked
In Line Management, the line shows the group name and member count instead of an Assign button.
In Settings → Team → Groups, the group's Lines count goes up.
Ask a group member to refresh. They should see the line in their line filter and its conversations in their inbox.
Remove a line from a group
In Line Management, click Clear next to the group name or member count on that line.
Good to know
Everyone sees everything on the line by default. Every member of the group sees every conversation on the group's lines. To limit a user with the User role, turn on Only own conversations for them in Settings → Team. They then only see the conversations they own plus unassigned ones. See Conversation Owners.
Personal line plus group line: A member who also has a personal line can start new conversations from either line. To keep automated messages (like reminders) on the shared line, have the CRM workflow send as a CRM user whose email matches a team member who belongs only to that group and has no personal lines. That user's lines are then just the group's lines. If the group has several lines, which one is used isn't guaranteed.
Existing conversations stay on the line they started on.
Notifications: A group assignment counts as "assigned." Mobile notification settings have two options, Assigned lines only and All conversations, and only Admins can choose All conversations. Members with the User, all lines role see every line but only get pushes for lines assigned to them.
Common issues
The group shows 0 members. No one has been added yet. Click the pencil icon on the group and add members. A group with no members rings nobody on inbound calls.
The group shows 0 lines. The group exists but no line is assigned to it yet. Follow step 2.
I don't see the User/Group switch or my group when assigning a line. The switch only appears once the account has at least one group. Make sure you switched the popup to Group and that the group was saved. Then refresh the Line Management page. If it's still missing, contact support.
I can't delete a group. A group that still has lines can't be deleted. Unassign the group from its lines first.
Calls aren't ringing the group. Check that Inbound calls is on in Settings → Dialer & FaceTime, that Person assigned to the line is selected (groups can't be picked under Specific people), and that the group has members. See the inbound dialing article above.
A member isn't getting push notifications. They need to have accepted their invite, be signed in to the mobile app and have inbound alerts turned on. If the conversation has an owner, a member with the User role only gets pushes for conversations they own.