Setup Automations
To get started with Zapier Close Automation's, you'll first need to generate an API key via the admin panel which you can do so here:
https://help.tryprojectblue.com/article/api-keys
Getting started:
Once you've obtained your API key, you'll need to be invited to the Project Blue Zapier app workflows by reaching out to our support team.
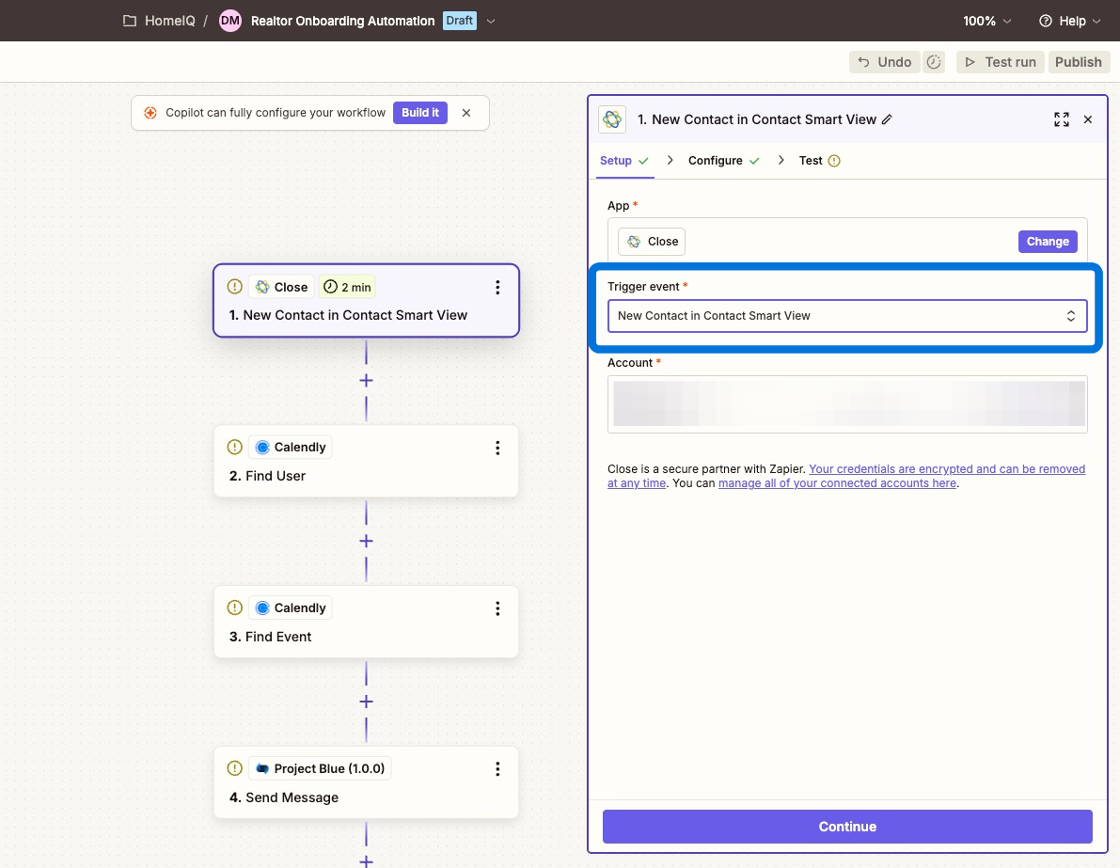
Setting a trigger
Close natively has ton's of trigger's to choose from based on the automation flow / sequence you're trying to do. For example, you can create new trigger's based on "New Lead" or a "New Lead in Smart View" if you want to get more granlar.
You'll need to authenticate with Close by logging into your account if you haven't already.
In the example below, we've set a trigger based on when a new contact is added to a smart view, their are lots of configuration's you can setup!
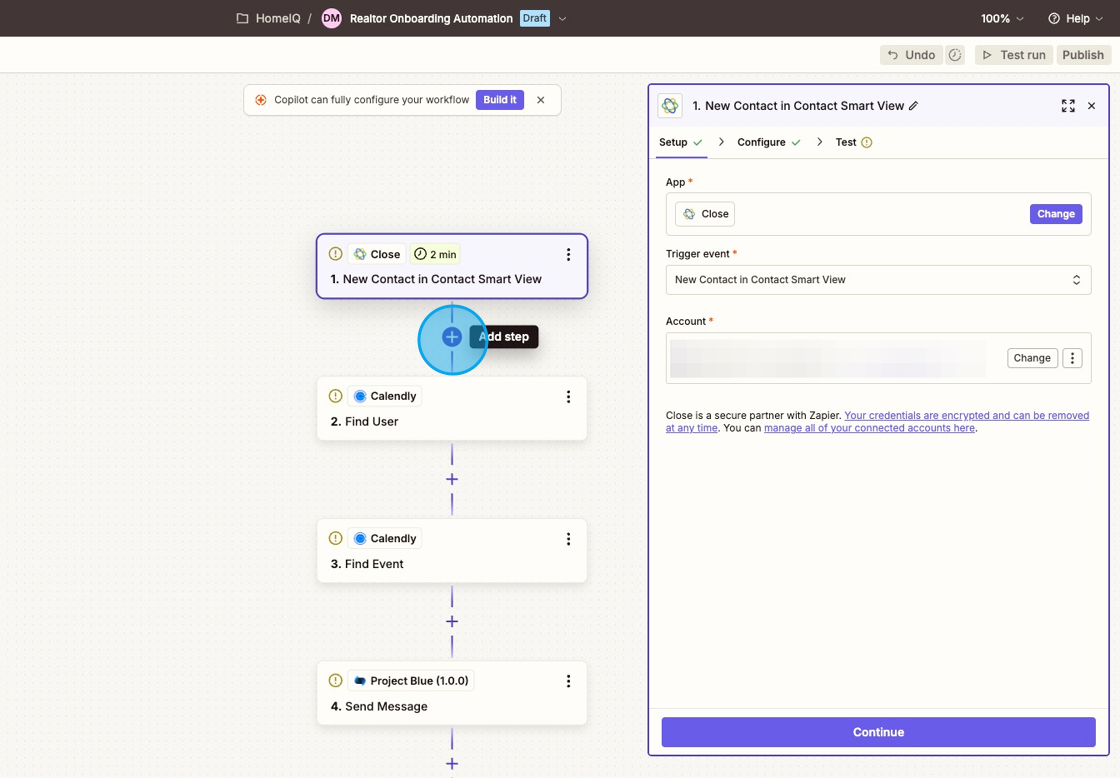
Create Project Blue Workflow Action
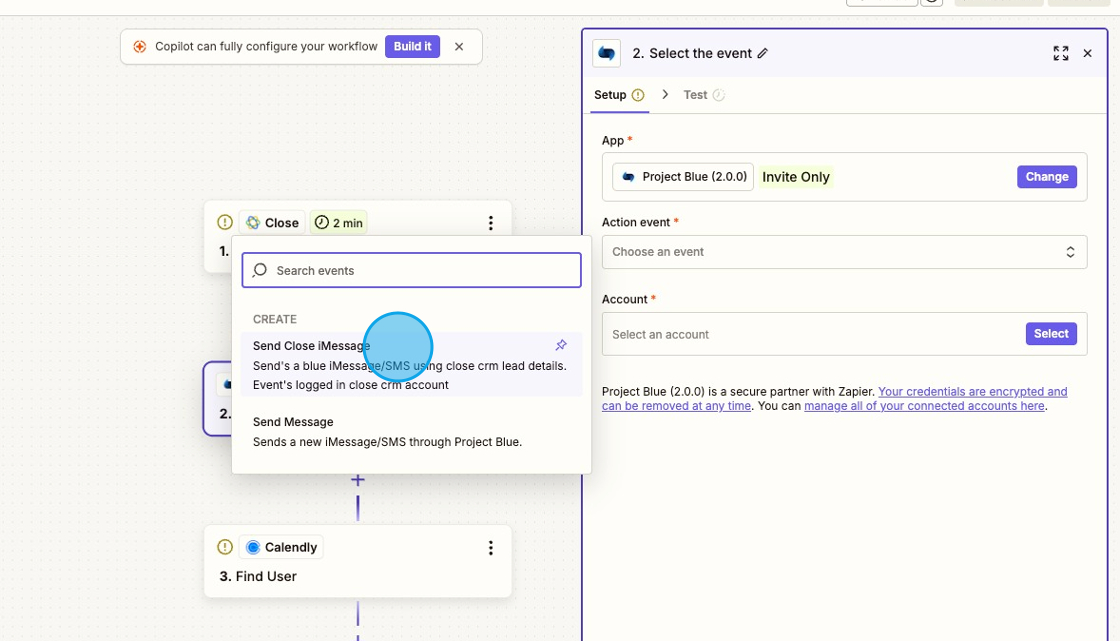
1. Click "Add Step" button
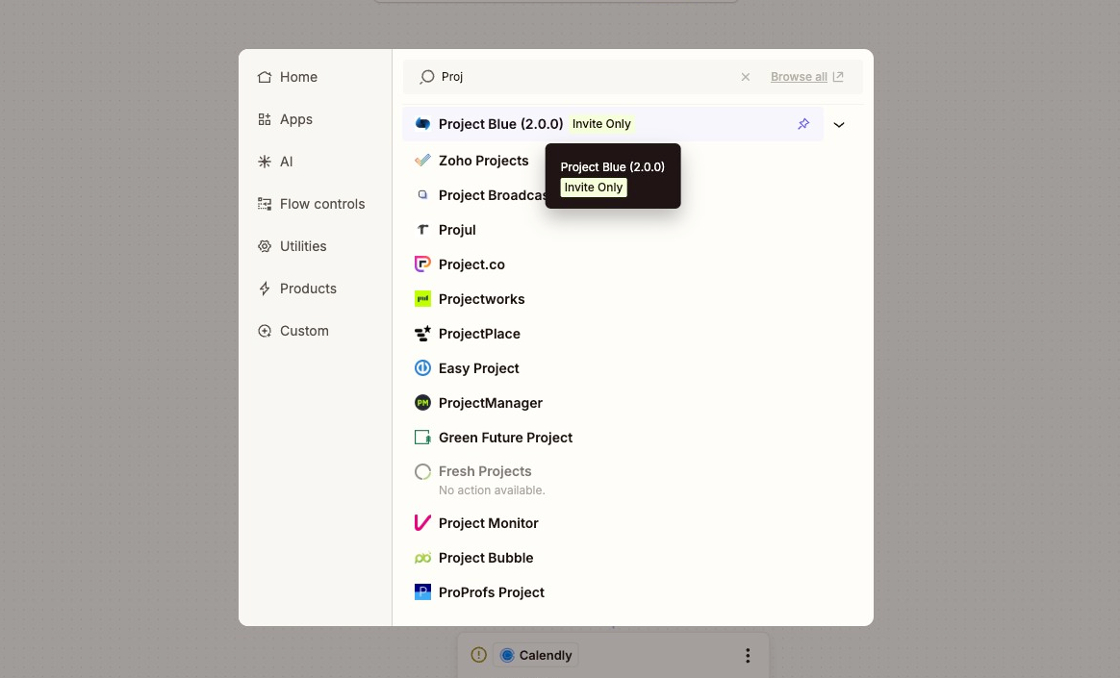
2. Type "Project Blue" in the action finder and select it
As a reminder, if you don't see this listed as an option, that means you'll still need to be invited to join the zapier app.
Contact our support to get access.
3. Set "Send Close iMessage" as the Action Event
As a reminder, please be careful and select the correct event when connecting with Close otherwise the message's will no not be synced with Close's system
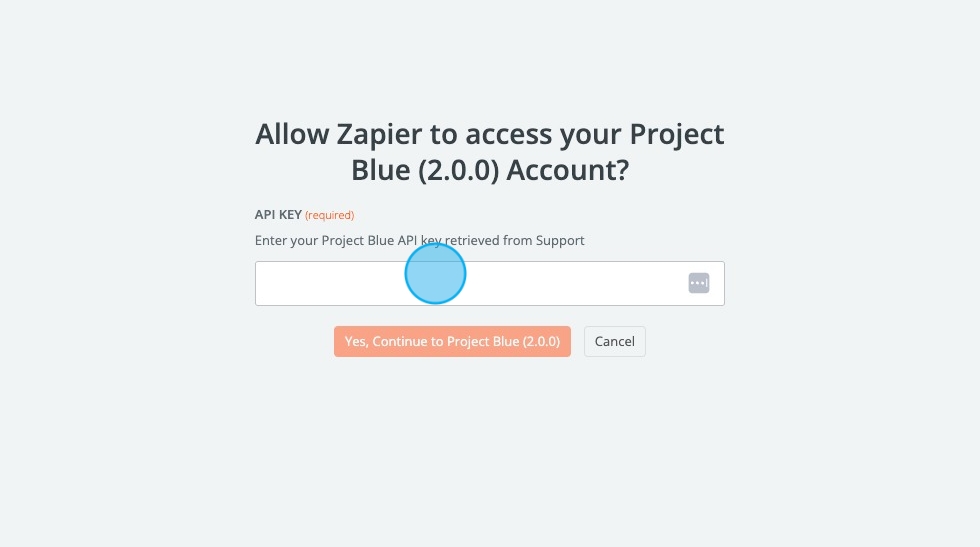
4. Click "Account" then "Connect new account" to connect zapier to Project Blue

5. Enter in the Project Blue API from the previous steps above
And that's it, you're ready to start configuring your messaging once you've made the connections
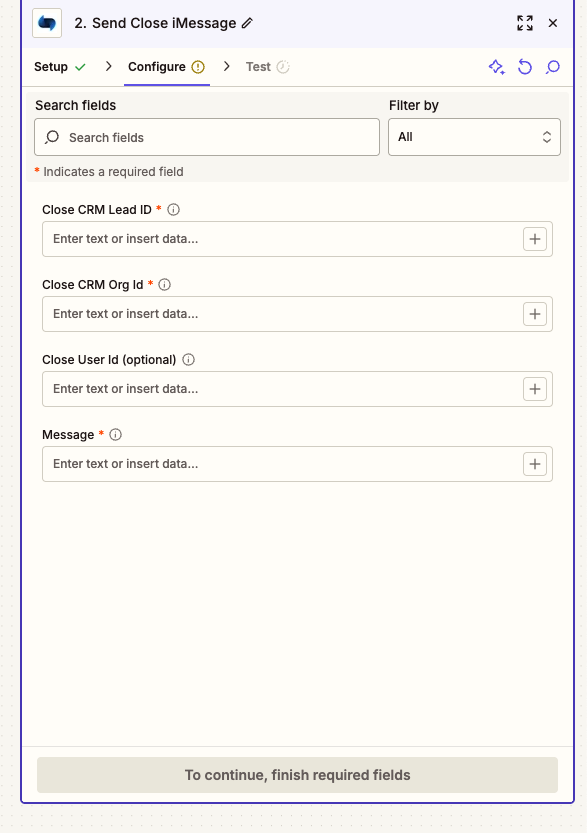
Configure Messaging
To get started messaging, the 2 fields you'll need to pass in from the previous steps are the Close CRM Org Id and the Close CRM Lead ID so our system know's the close account and contact / lead our system is messaging with
Once these value's are set, you can configure the "Message" by entering in the text you'd like to send with the use of Dynamic value's as well using Zapier's workflow